How to Send a File
The P2P file transfer feature allows you to send a file or group of files of unlimited size to one or more contacts. The files are compressed, encrypted and sent through direct communication channels, making the file transfer feature secure and fast.
You can use the file transfer feature in several ways, grouped in two main methods: drag and drop, and manual selection.
Drag and Drop
You can transfer files by dragging and dropping the file(s) or folder(s) you would like to transfer directly into several locations: a contact name in your contact list, a text chat window, a chat room window, or an active voice or video call window.
- Dragging and dropping a file or folder onto a name in your contact list
- Dragging and dropping a file or folder into an open text chat window
- Dragging and dropping a file or folder into an open chat room window
- Dragging and dropping a file or folder into a voice call window
Once you have dropped your file(s) or folder(s), a dialogue box will appear showing you the status of your transfer. From here you can see the transfer status, cancel the transfer, or select the “Close when download completes” option to close the window automatically.

Manual Selection
The other method for transferring files is by manually selecting the “Send Files” icon in the contact list, in a chat window, in a chat room window, through the “Actions” menu, or by right-clicking the file or folder and sending it directly to the Brosix application, all explained below.
Sending file(s) or folder(s) through the contact list, Actions menu, chat window, or chat room window follow a similar set of steps.
Sending files through the contact list
To send file(s) or folder(s) through the contact list, select the “Send Files” icon. After selecting the icon, the “Select Users” window will open allowing you to select which users to send the file(s) or folder(s) to from among your contacts currently online. You can add and remove users to the “Selected Contacts” list by selecting one or more users and clicking on the respective button. After adding the users you would like to send the file(s) to, click the “OK” button, and the “Send Files or Folders to (contact name)” dialogue box will open.
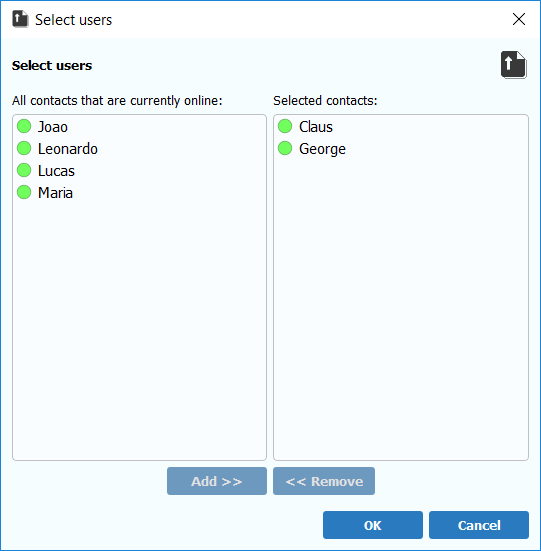
Note: if you first selected the intended recipient(s) in your contact list and then selected the “Send Files” icon, you will begin the process with the next step.
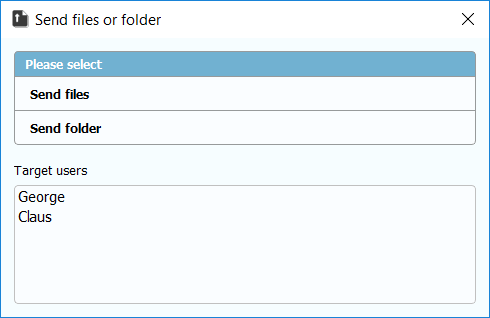
From the “Send Files or Folders to (contact name)” dialogue box you can choose whether to “Send files” or “Send folders.” After selecting one of the options the “Select Files” window will open allowing you to select the file(s) or folder from your computer that you would like to send. Once you make your selection, click open to send the file(s) or folder.
Once you have clicked the “OK” button, a dialogue box will appear showing you the status of your transfer. From here you can see the transfer status, cancel the transfer, or select the “Close when download completes” option to close the window automatically.

Sending files through the actions menu
After clicking on the “Actions” menu, select the option “Send Files.”
If you have selected the action menu without having first selected a user or users in the contact list, then the “Select Users” window will open and you should follow the steps outlined above from that point.
If you have already selected a user or users in the contact list then the “Send Files or Folders to (contact name)” dialogue box will open and you should follow the steps above from that point.
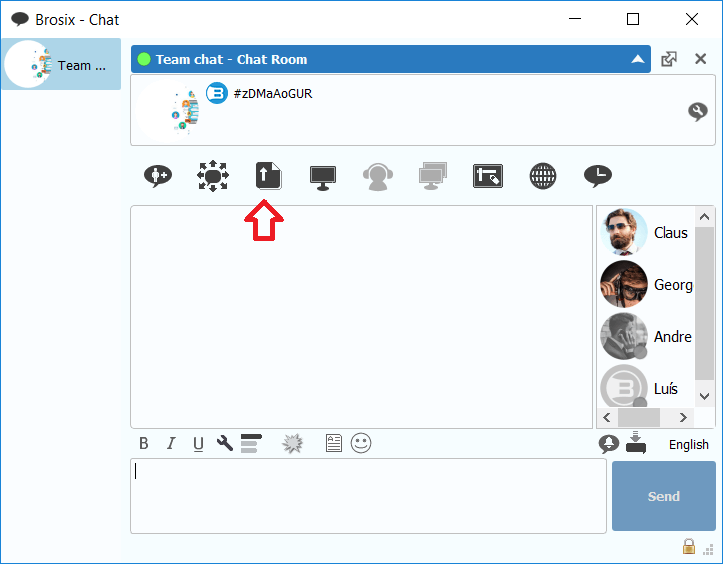
Sending files through a chat or chat room window
After clicking on the “Send Files” icon in either a chat window or a chat room window the “Send Files or Folders to (contact name)” dialogue box and you should follow the steps above from that point.
Sending files by right-clicking and sending directly to Brosix
You can send one or more files or folders by right-clicking on your selection, selecting the “Send to” option and selecting “Brosix.”
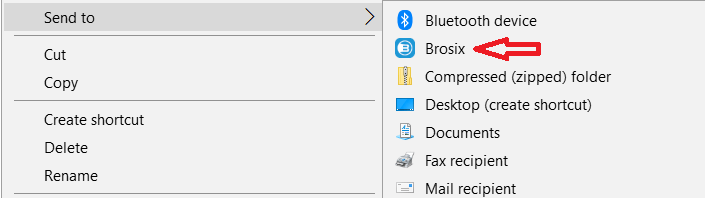
Once you select “Brosix” the “Select Users” window will open allowing you to select which users to send the file(s) or folder(s) to from among your contacts currently online, as described above. Once you have made your selection, click the “OK” button and your file transfer will begin and a dialogue will appear showing you the status of your transfer, as described above.
- How to protect some users data?
- Control IP addresses allowed to Login
- Connect Brosix to hundreds of other apps with Integrately
- Connect Brosix to thousands of other apps with Zapier
- Step-by-Step Guide to Brosix Live Chat
- Notifications API
- How to Install Brosix Live Chat on your WordPress website
- How to Connect to Another Team Network
- I do not receive notifications on my Android device anymore.
- Brosix does not open on my Mac