Brosix is a secure instant messenger which provides a great option to create a private team network and optimize your company or department communication. Brosix hosts your team network on dedicated servers, and you have full administrative control over it. Once you create your network, you will get full access to an easy to use Control Panel that will provide you with options to manage and administer your network and users.
Below you can find the steps necessary to create a Team network
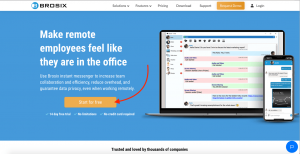
- Go to brosix.com and begin the registration process by clicking on the orange button ‘Sign up for free’.
- Enter your email addressin the form. After clicking on the ‘Begin Team Network Creation’ button, you will begin the process of registering your Brosix network.
- Start by adding your First name.
- Add your phone number.
- Give your Team Network a name. For instance, this could be your company’s name.
- Finally, choose a password which you will use to access the administrator’s Brosix Control Panel with.
- After clicking on ‘Continue to Activation’, you will have to enter an activation code that has been sent to your email address.
- Copy and paste it to the form. Then click on ‘Activate your team’.
- You will then be asked to invite the first members of you Team Network. You are able to skip this step and add your users later from the Brosix Control Panel.
- Congratulations! You can now access the Brosix Web Applicationby clicking on ‘Start the App’.
- Welcome to the Brosix Web App! You can now download the desktop applicationto start benefiting from all enterprise features, including Screen-Sharing, Screenshot, and more.
- To add more users to your network, organize the team in groups, manage your data and payments, you should continue to the Brosix Control Panelfrom the ‘Open Control Panel’ button.
- Welcome to your Control Panel!
If you have any questions on how to work with the Brosix Control Panel and setup your users, please feel free to book a demo session with one of our Brosix specialists from www.brosix.com/demo/
