Receiving Files
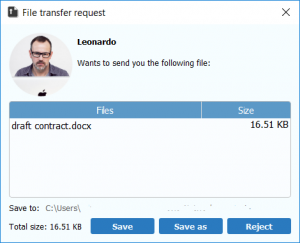
Once a contact sends you a file or files you will see a notification on your computer informing you that “(contact name) wants to send you files.” Click on this notification and you will be directed to the “File Transfer Request” window. Please note that if you are currently in an active chat with this contact this window will open directly. From here you have three options:
- Save the file to your pre-designated location which is listed in the window by clicking on the “Save” button
- Choose a new destination to save the file by clicking on the “Save as” button. This will launch a window where you can select your preferred destination
- Reject the file transfer by clicking on the “Reject” button
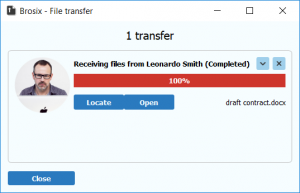
Once you choose to save your file, the “Brosix- File Transfer” window will launch where you can see the status of the transfer.
Once the transfer is complete you can choose to open the file directly by clicking on the “Open” button, locate the file by clicking on the “Locate” button, or close the window by clicking on the “Close” button
Scanning Received Files with Anti-Virus Software
You can set up the Anti-Virus Check in few simple steps. Please note that this feature is deactivated by default for new users, and they will need to activate it.
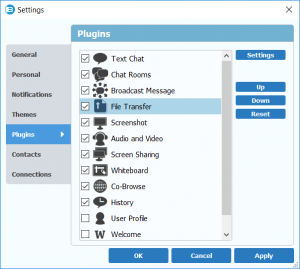
Setting up Anti-virus Software Integration
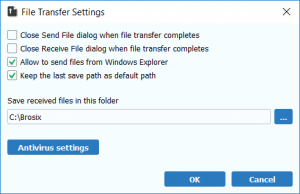
The “File Transfer Settings” window will now open, where you will see a range of different features related to file transfers. From here you can select whether to close the send and receive dialogue boxes after files are transferred, allow the sending of files from Windows Explorer, save the last save file path, and chose your preferred destination for saved files.
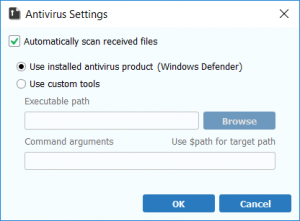
In order to complete the process of integrating your anti-virus software, click on the “Anti-virus settings” button. You will see that upon opening this window, the Brosix app has automatically recognized the anti-virus software on your computer and selected the option to “automatically scan received files.” If you would like to select a different software, select the “use custom tools” option and locate your preferred software through the “browse” option.
Once you have selected your desired settings, click the “OK” button and exit the window. Your anti-virus software will now automatically scan all incoming files that you receive through the Brosix app.
