With Brosix you can set up custom settings for individual users by following these instructions:
- Log into the Control Panel at net.brosix.com
- From the Dashboard choose Users->Users Accounts
- Choose the user whose settings you would like to change
- From the Menu, please choose the option(s) you would like to alter (see image above). Below you will find short descriptions of each of the options in the User Account menu.
![]()
- Settings – through the Settings tab you can change the user’s status and security level
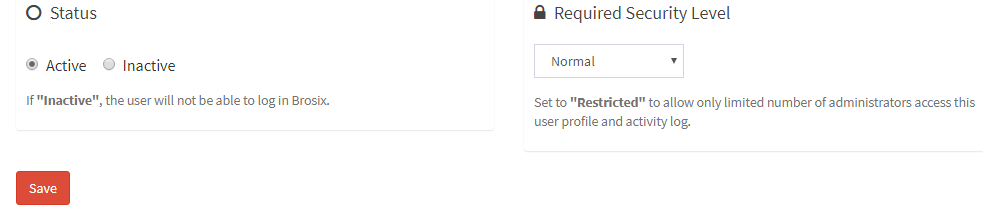
- Status – You can change the user’s status to “Active” or “Inactive.” If the status is “Active” the user will be present in your contact list and will be able to access your network. If the status is “Inactive” the user will not be able to login and use Brosix.
- Required Security Level – You can set the security level to “Normal” or “Restricted.” If the level is “Normal” all administrators can access this user’s profile and activity log. If the level is “Restricted” only a limited number of administrators can access this user’s profile and activity log.
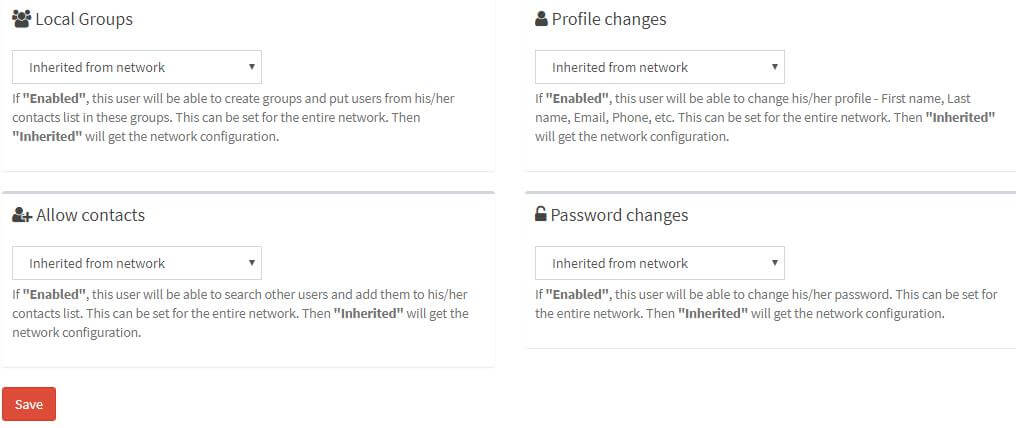
- Control – through the control tab you can adjust the user’s privileges to change their groups, profile, contacts and password.
- Local Groups – You can enable and disable the user’s ability to create local groups and put users from their contacts list into groups. Or you can set the “Inherited from network” option, meaning that the user will get the network configuration for this option.
- Profile changes – You can enable and disable the user’s privilege to change their profile. Or you can set the “Inherited from network” option, meaning that the user will get the network configuration for this option.
- Allow Contacts – You can enable and disable the user’s privilege to change their contact list by adding or removing contacts. If enabled, the user will be able to search for other users and add them to their contact list. Or you can set up “Inherited from network” meaning that the user will get the network configuration for this option.
- Password changes – You can enable or disable an user to change its password. Or you can set the “Inherited from network” option, meaning that the user will get the network configuration for this option.
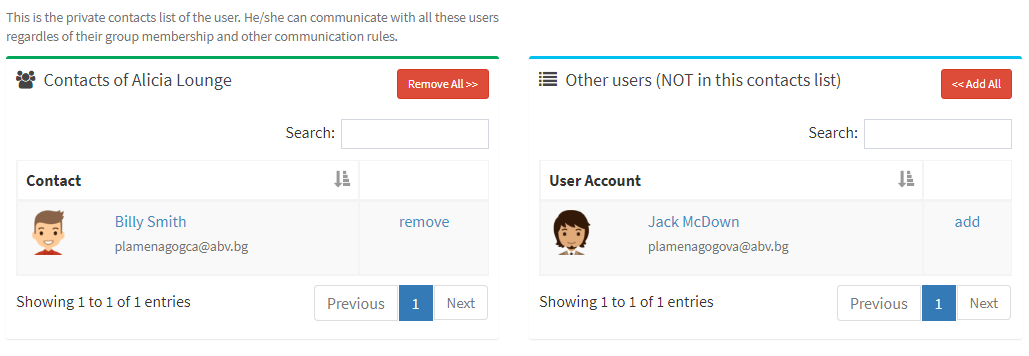
- Contacts – You can set which contacts should be included or excluded from the user’s contact list. You can change the number and configuration of the contacts at any time.
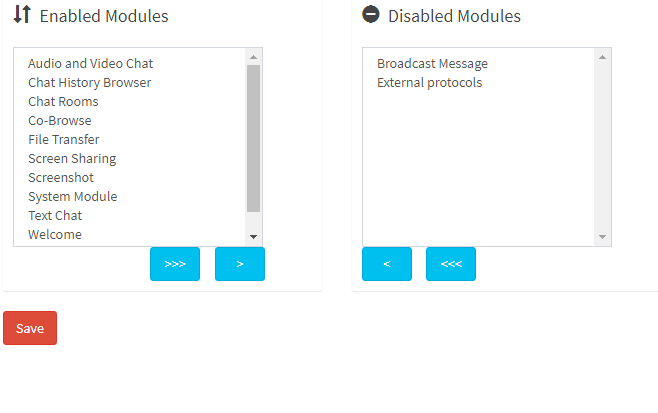
- Modules – You can restrict individual user access to some or all features on your network.
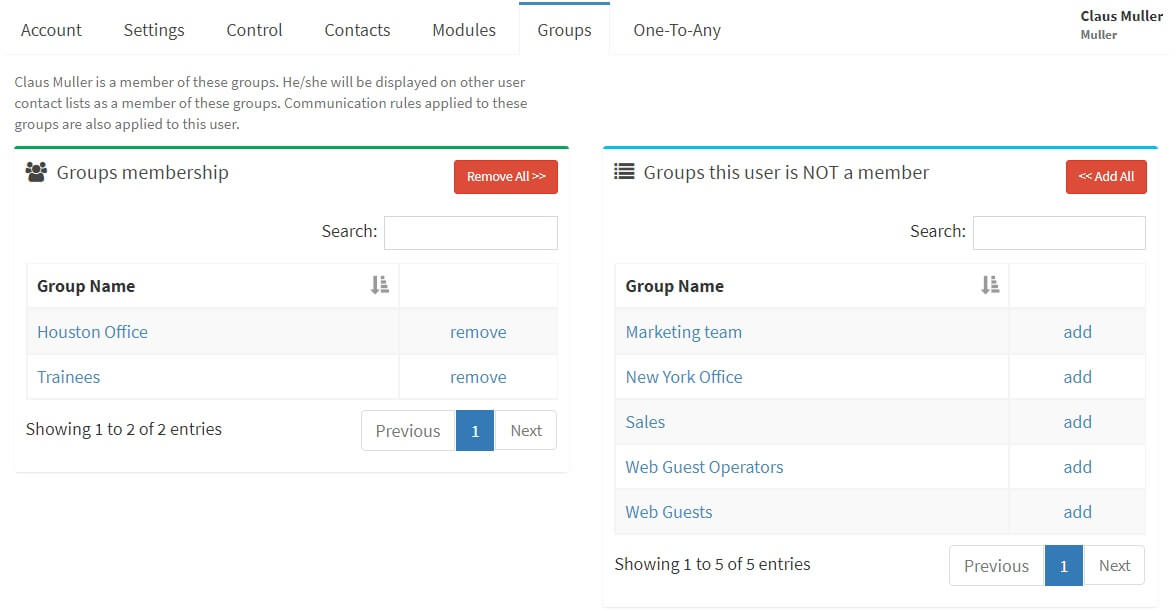
- Groups – You can assign the user to specific groups. The user’s group participation will be visible in the contact lists of other users.
- One-to-Any – You can enable the “Onе-to-Any” option for specific groups. When the “One-to-Any” option is enabled, the user will see all group members of the group even if the user is not a member of it.
In order to save the changes click on the ‘Save’ button shown below