Finding a specific contact in a long contact list can be time-consuming. That is why many companies decide to separate users into different groups. For example:
- Accounting office
- Marketing office
- Customer Support office
The members of these groups can communicate between each other and you can add new members and delete current ones at any time.
In order to create and modify groups please follow these instructions:
- Log into the Control Panel at net.brosix.com
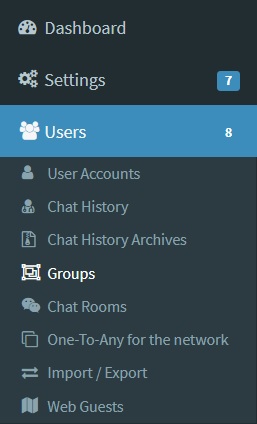
- From the Dashboard choose Users -> Groups (see image below)
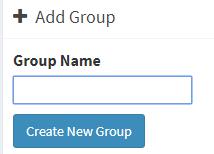
- Create a group name and click on the “Create New Group” button (see image below)
- Once you create the group, select it and review the group settings (see image below).
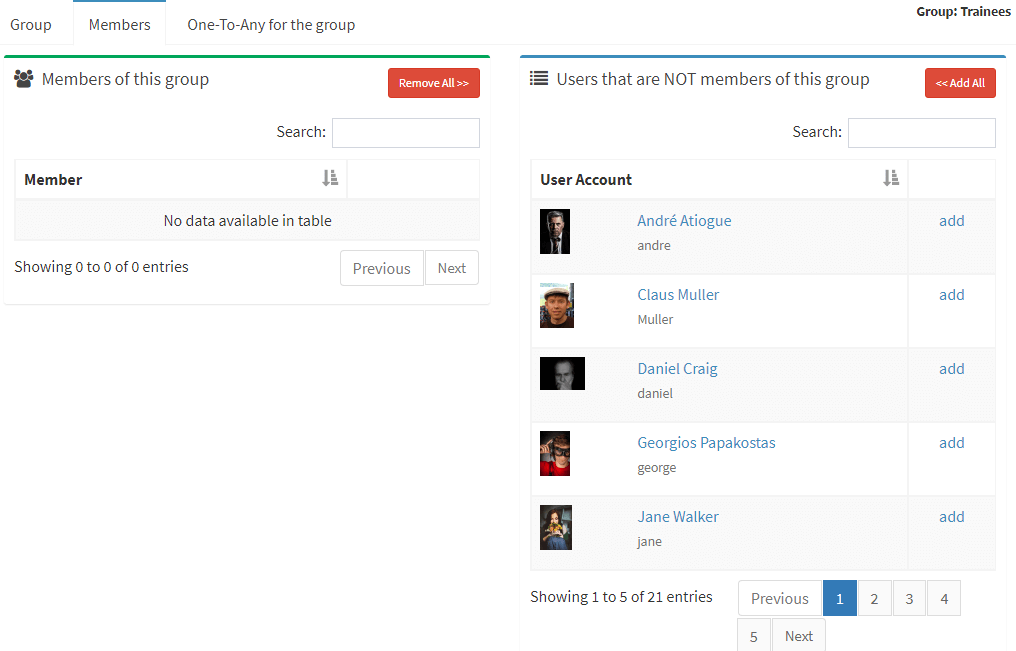
- In order to edit the members of the group click on the “Members” tab (see image below). To add users to the group click on the “add” link on the list on the right side of the screen. To remove users from the group click on the “remove” link on the left side of the screen.
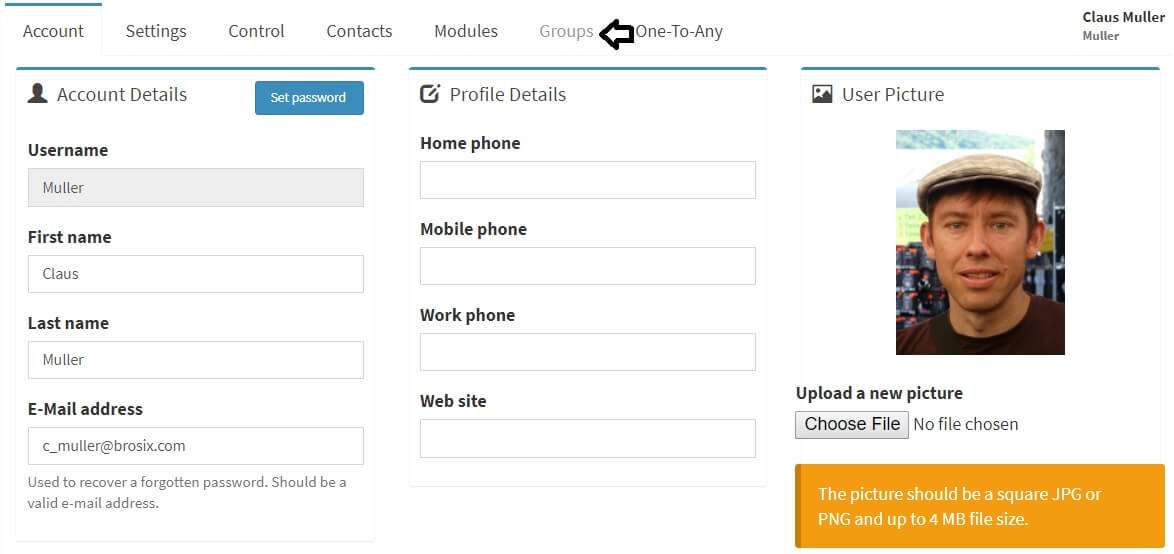
- Log into the Control Panel at net.brosix.com
- From the Dashboard choose Users -> User Accounts
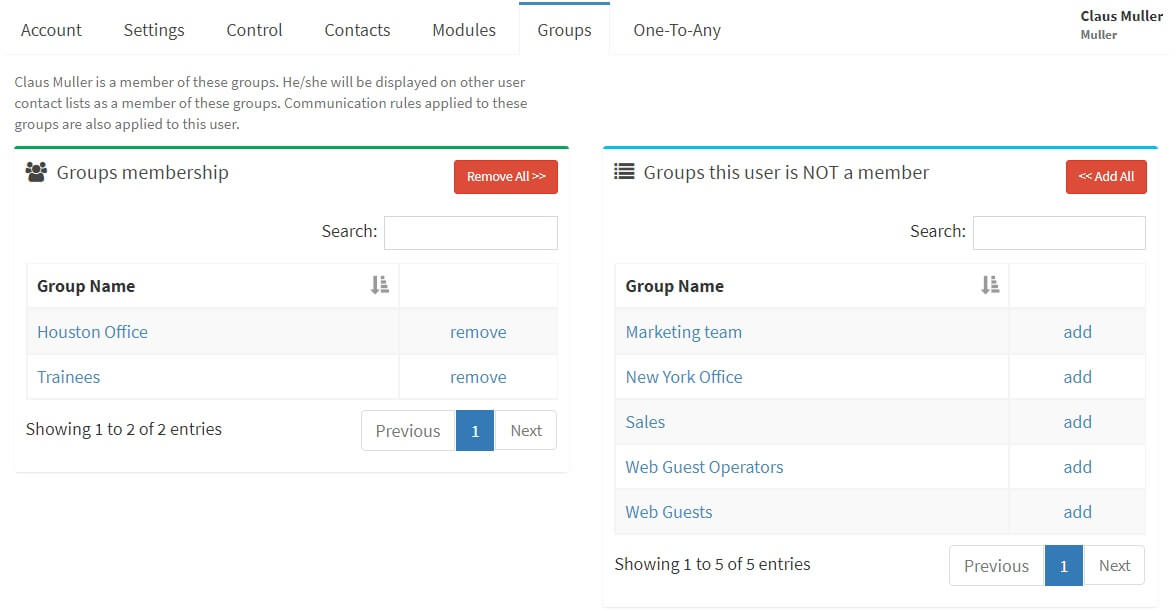
- Select the name of the user and click it, and a menu of options will appear. Select the “Groups” tab.
- From this tab you will see which groups the user participates and does not participate in. If you need to make any alterations, please follow these steps:
- If you would like to remove the user from a group click on the “remove” sign next to the appropriate group name. Alternatively, you can click on the “Remove All” button to remove the user from all groups.
- If you would like to add the user to a group click on the “add” sign next to the appropriate group name. Alternatively, you can click on the “Add all” button to add the user to all available groups.
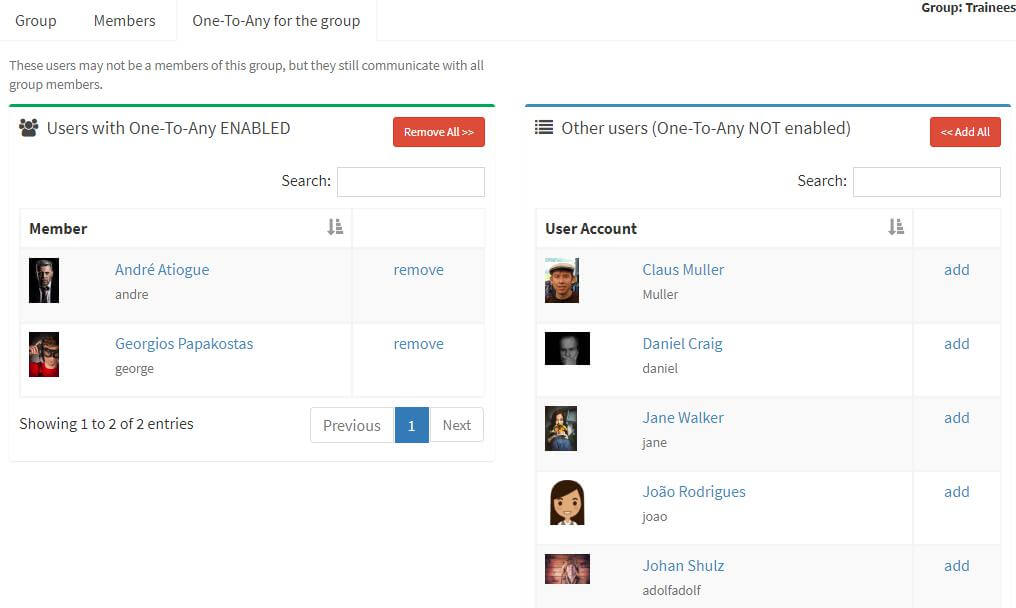
- If you would like to permanently allow a user or users to communicate with the participants of the group, you can select the “One-To-Any for the group” tab and add specific users (see image below). A “One-To-Any” user will be able to communicate with the users in the group without being part of it.
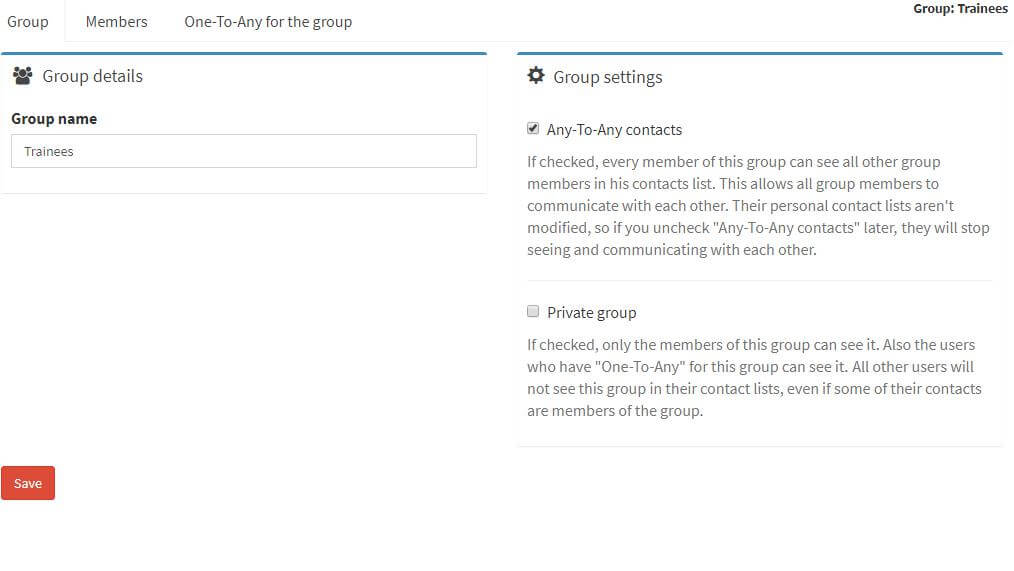
You can check “Any-to-Any contacts,” meaning that every participant of the group will see other group participants in their contact list. This option gives the participants the opportunity to freely communicate between themselves.
You can also check “Private group,” meaning that only the participants of this group and those who have “One-to-Any” activated (see point VI) will see it. The rest of the users on your network will not see the group.
You can deselect both options as well.
In order to save the details click on the“Save” button.
You can also implement this feature for individual users. In order to do this please follow these instructions:
One-to-Any is a feature that can be implemented for an individual user as well.
In order to activate it please follow these instructions:
- Log into the Control Panel at net.brosix.com
- From the Dashboard choose Users-> User Accounts
- Select the user and click on their name
- From the Menu choose the “One-to-Any” tab. On the screen you will see in which groups “One-to-Any” is activated.
- In order to make alterations please follow these instructions:
- If you would like to disable “One-to-any” for a user in a specific group, locate the name of the group and click on the “Remove” sign. Alternatively, you can click on the “Remove All” button to disable One-to-Any for all groups.
- If you would like to enable One-To-Any for the user in a specific group, locate the name of the group and click on the “add” sign. Alternatively, you can add the user to all available groups by clicking on the “Add All” button.
