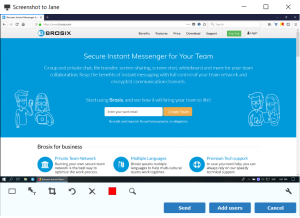
The Send Screenshot feature allows you to quickly send a picture of your desktop to a contact or group of contacts with a few simple steps.
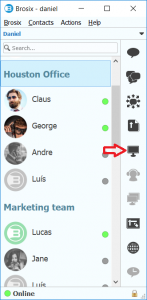
You can send a screenshot in numerous convenient ways: by clicking on the “Send Screenshot” icon in the contact list after selecting one or more online contacts, in the contact list without initially selecting a contact, in a chat window, in a chat room window, to an entire group in certain types of contact lists, through the “Actions” menu, and with hotkeys, all described below.
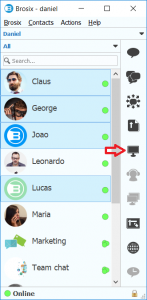
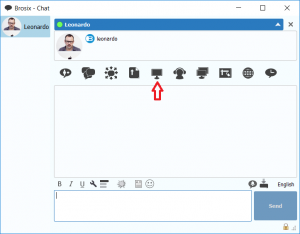
Sending a Screenshot through the Contact List, Chat Window or Chat Room Window
Once you have clicked on the “Send Screenshot” icon in one of these 3 locations a “Screenshot to (contact name)” window will open with the screenshot itself along with a control bar at the bottom of the window.
From the control bar you can edit the screenshot by cropping it, adding annotation arrows and highlighting areas of the screenshot. You can also add additional contacts to the recipient list by clicking the “Add Users” button.
Once you have completed your desired changes, click the “Send” button to send the screenshot to the recipient(s). The screenshot will be sent after the recipient(s) accept the transfer. If you are sending the screenshot to a chat room, all of the chat room participants will receive the image.
Please note: there is an extra step when sending a screenshot by selecting the “Send Screenshot” icon directly from the contact list without initially selecting a contact. After clicking on the icon, the “Select Users” window will open superimposed over the “Screenshot to (contact name)” window.
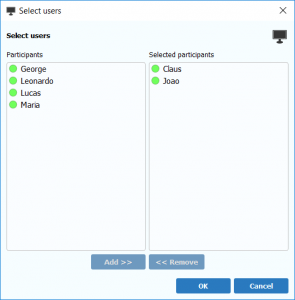
From the “Select Users” window you must first select which users to send the screenshot to from among your contacts currently online. After adding the users you would like to send the screenshot to, click the “OK” button and follow the steps above.
Sending a Screenshot through the Actions Menu
To send a screenshot through the “Actions” menu, open the menu and select the “Send Screenshot” option. After selecting the option the “Select Users” window will open. From the “Select Users” window you must first select which users to send the screenshot to from among your contacts currently online. After adding the users you would like to send the screenshot to, click the “OK” button and follow the steps above in order to edit and send the screenshot.
Sending a Screenshot to a Group
You can send a screenshot to an entire group through the contact list if you are using the “compact” or “extended” contact list view in Brosix 4.0. To send a screenshot to a group, select the group and click the “Send Screenshot” icon in the contact list. After clicking the icon, follow the steps above in order to edit and send the screenshot.
Sending a Screenshot via Hot Keys
In order to send a screenshot with Hot Keys, you must first enable this function in your Brosix profile. You can do so by clicking on the “Brosix” menu and selecting the “Settings” option. From the “Settings” window click on the “Personal” tab, then click on the “Hotkeys” tab, select the option “Enable Hotkeys,” and click the “Apply” button.
You can also refer to this video tutorial on sending screenshots for further information.
Once you enable the hotkeys function, you can send a screenshot by pressing the “Alt” and “F12” buttons. After pressing the hotkeys the “Select Users” window will open. From the “Select Users” window you must first select which users to send the screenshot to from among your contacts currently online. After adding the users you would like to send the screenshot to, click the “OK” button and follow the steps above in order to edit and send the screenshot.
You can also take a screenshot of your Brosix app by holding the “Ctrl” button and selecting the “Send Screenshot” icon in the contact list. This allows you to send screenshots of any aspect of your Brosix app, for example a text conversation or your contact list.
